

I built an app in a browser tab and it is now sitting on my home screen.
No Android Studio. No SDK download. No cable of shame, and no six hour setup.
By the end of this you will be holding your own app (and yes, that feels different from a link).
New here? Subscribe so the next build lands in your inbox. It is free.
It goes like this:
Switch AI Studio from web to Android with one picker
Describe the app in one plain sentence
Watch it write real Kotlin and open a phone emulator inside your browser
Fix things by talking, exactly like the web version
Plug your actual phone into your computer and press Install on Device.
Watch your app launch on the phone in your hand
Push it to the Play Store internal testing track so up to 100 people can install it
Learn what does not work on this path, before it wastes your Saturday
I’ll show you every step, with screenshots.
Two things before we start:
Save this, and do it on a day when your phone charging cable is nearby.
Send it to one founder who has been quoted a fortune for a mobile app.
Sharing is free, and it is how this newsletter grows.
Why I stopped telling founders “web first, always”
For years my honest advice was to build on the web and only go native when you had proof people wanted it.
That advice existed because Android development was genuinely expensive to start. You installed a large program, waited, configured a device, and usually gave up on a Tuesday.
At Google I/O in May of this year, that starting cost mostly disappeared.
AI Studio now generates native Android apps in Kotlin with Jetpack Compose, previews them in a phone emulator that runs in the cloud and streams into your browser, and installs them on a real device over your USB cable.
I still think web first is right for most products. I just no longer think “native is too hard to try” is a real sentence.
1. Flip one picker, and you are building a phone app.
This is genuinely the whole entry point, and it is easy to miss.
Step 1: Go to aistudio.google.com/apps in Chrome.
Step 2: Find Build mode using the navigation panel on the left.
Step 3: Look for the platform picker near the prompt box.
Step 4: Select Android. Not web. Android.
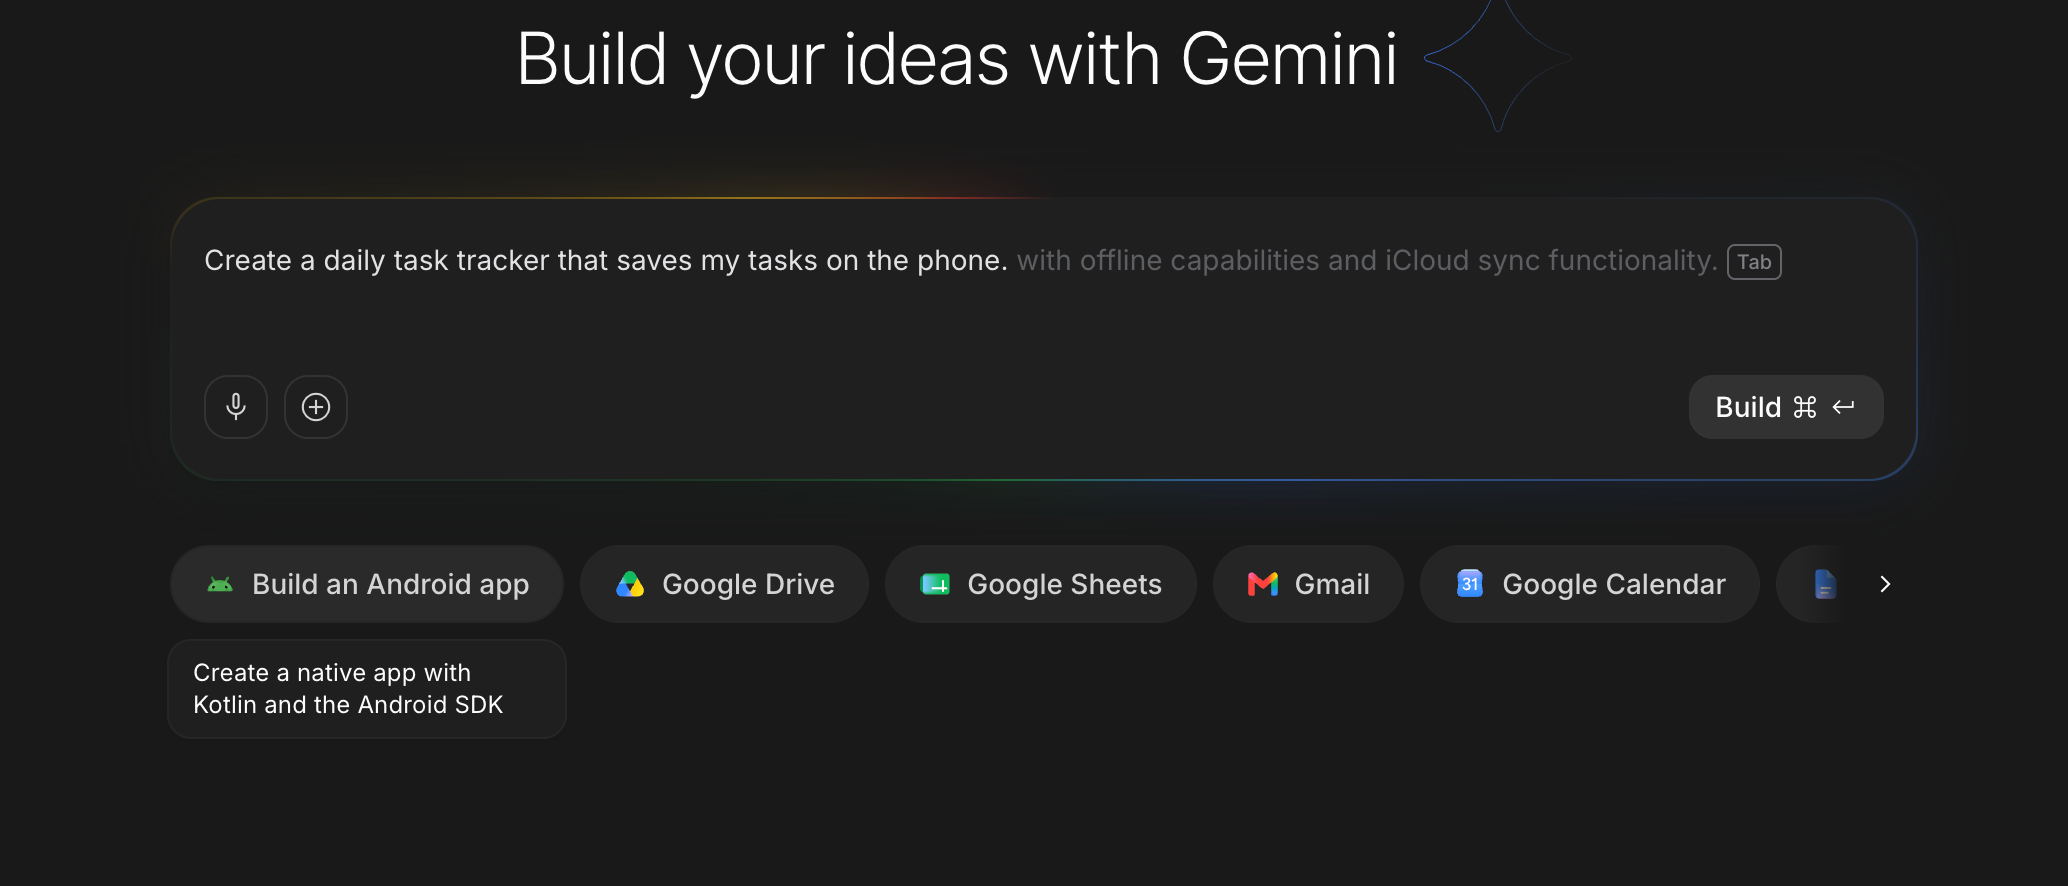
Step 5: Now type your app in one plain sentence, for example: “Create a daily task tracker that saves my tasks on the phone.”
Step 6: Send it, and wait while the agent generates the project.
Step 7: A phone shaped emulator will appear and your app will launch inside it.
What just happened underneath: it wrote a full Kotlin project using Jetpack Compose and Material 3 styling, with a single screen architecture, and it managed the build dependencies itself.
(you never have to learn what Gradle is today, but that is what was quietly handled).
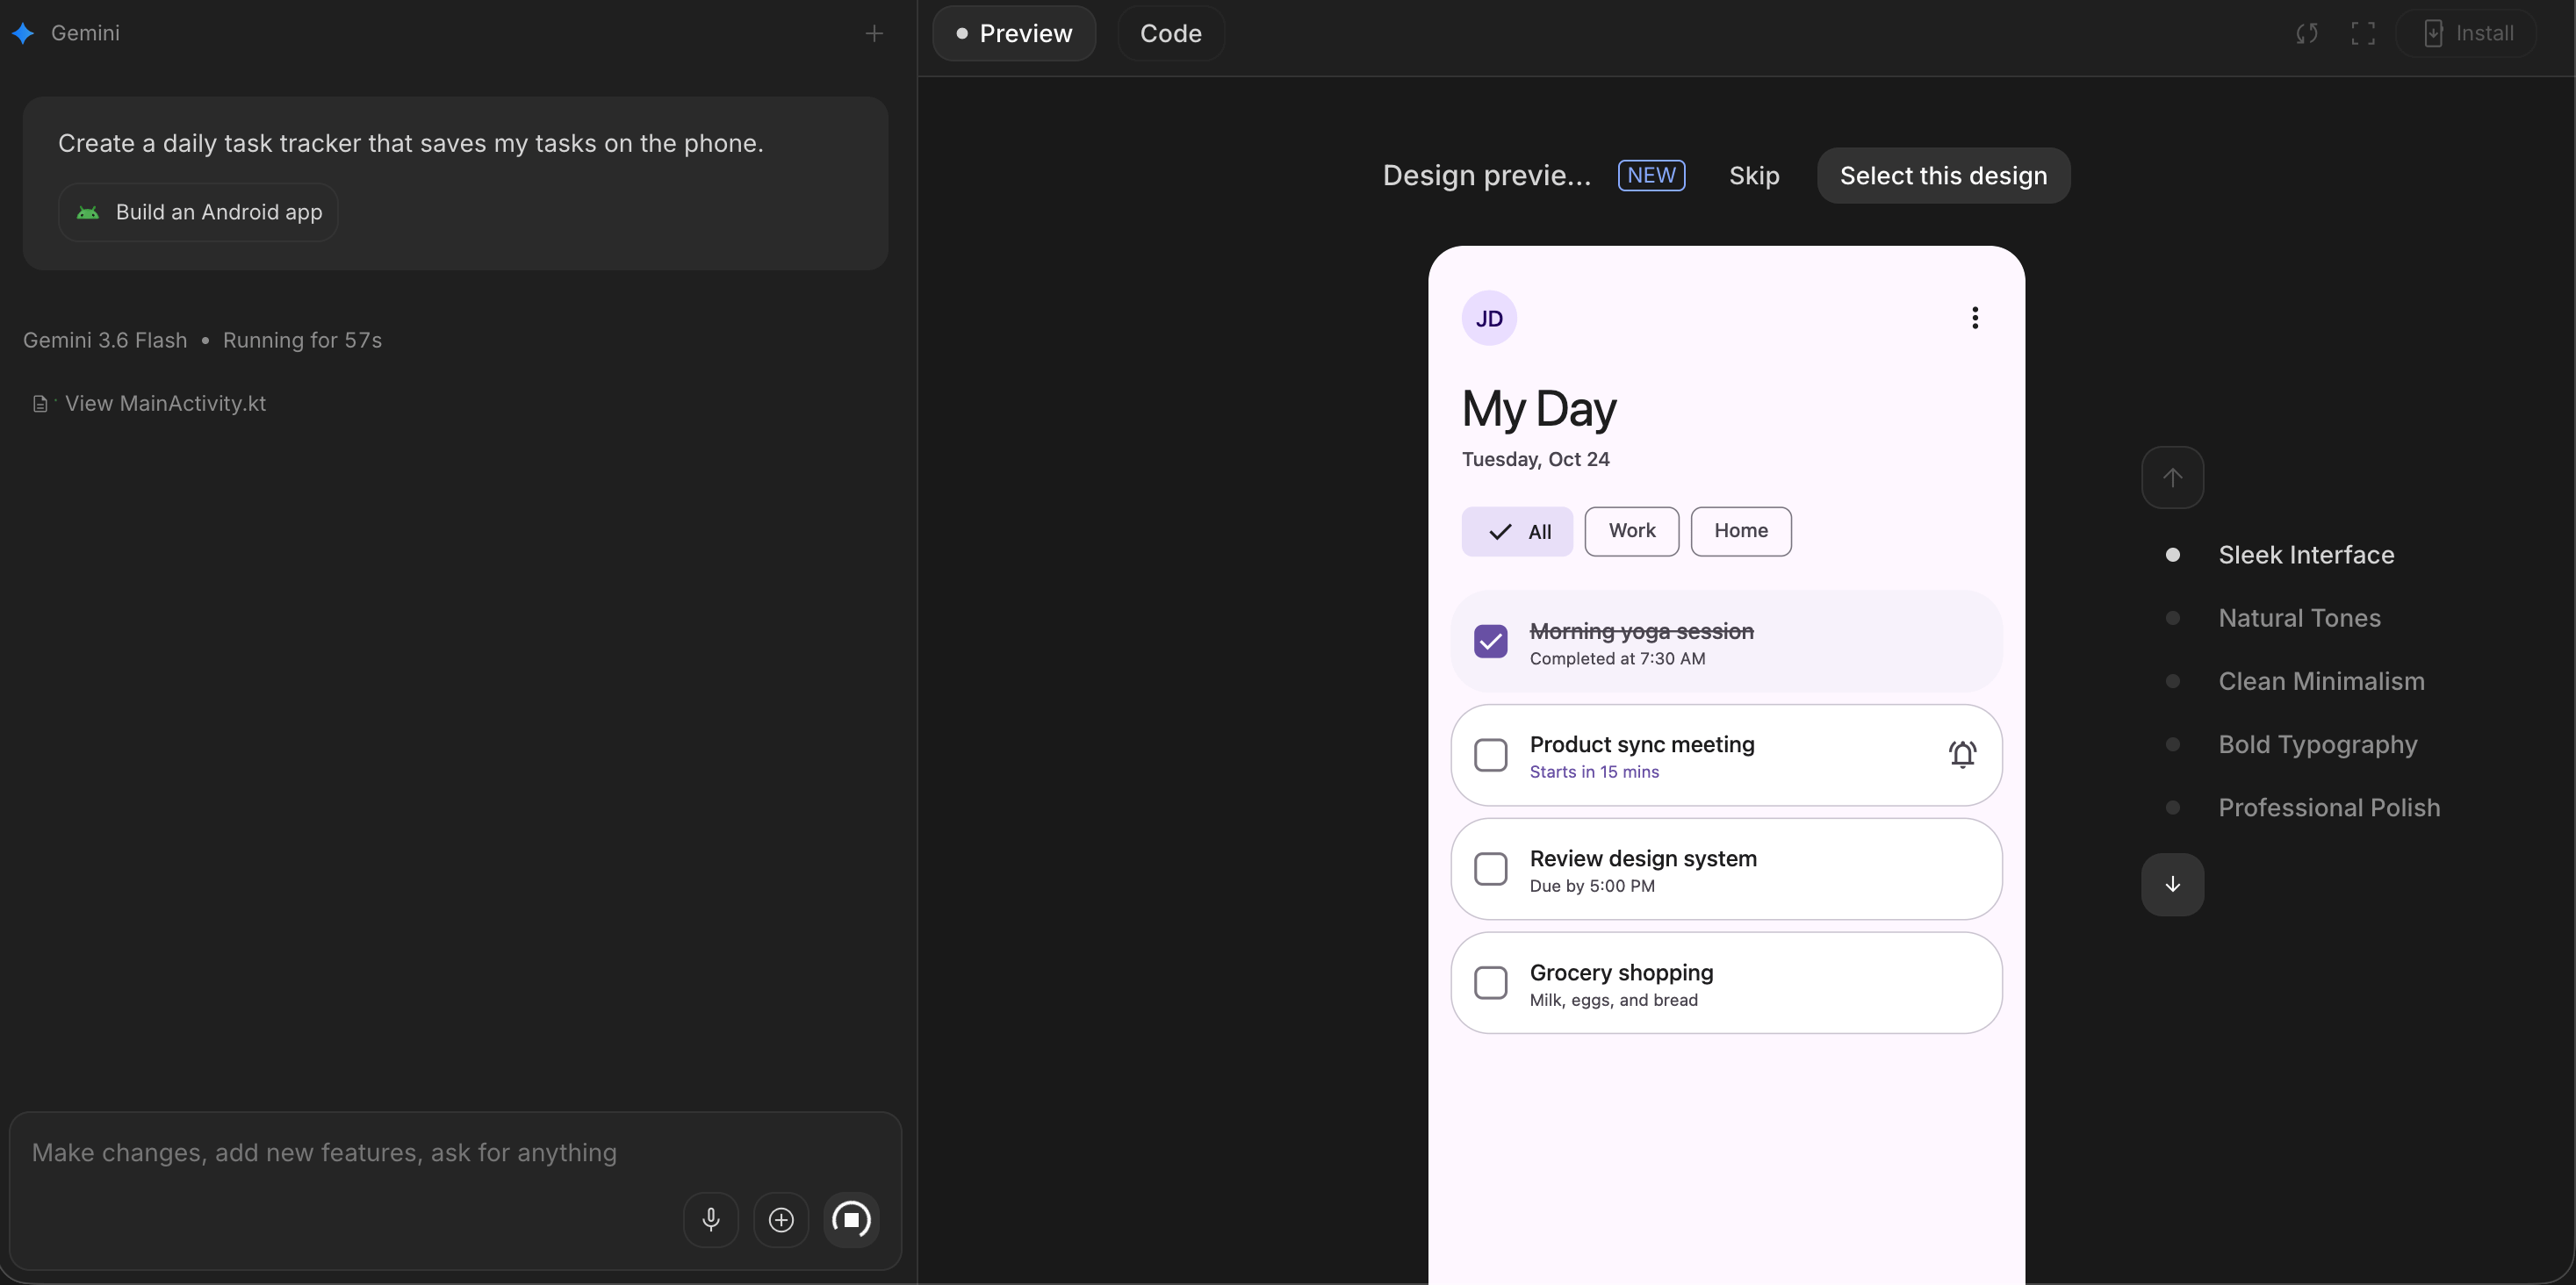
That is the app existing. Now here is how it gets onto a real phone, and into other people’s hands, every step, starting now.
2. A phone inside your browser, and what it will lie to you about.
The emulator is a real convenience and a real trap, so let us handle both.
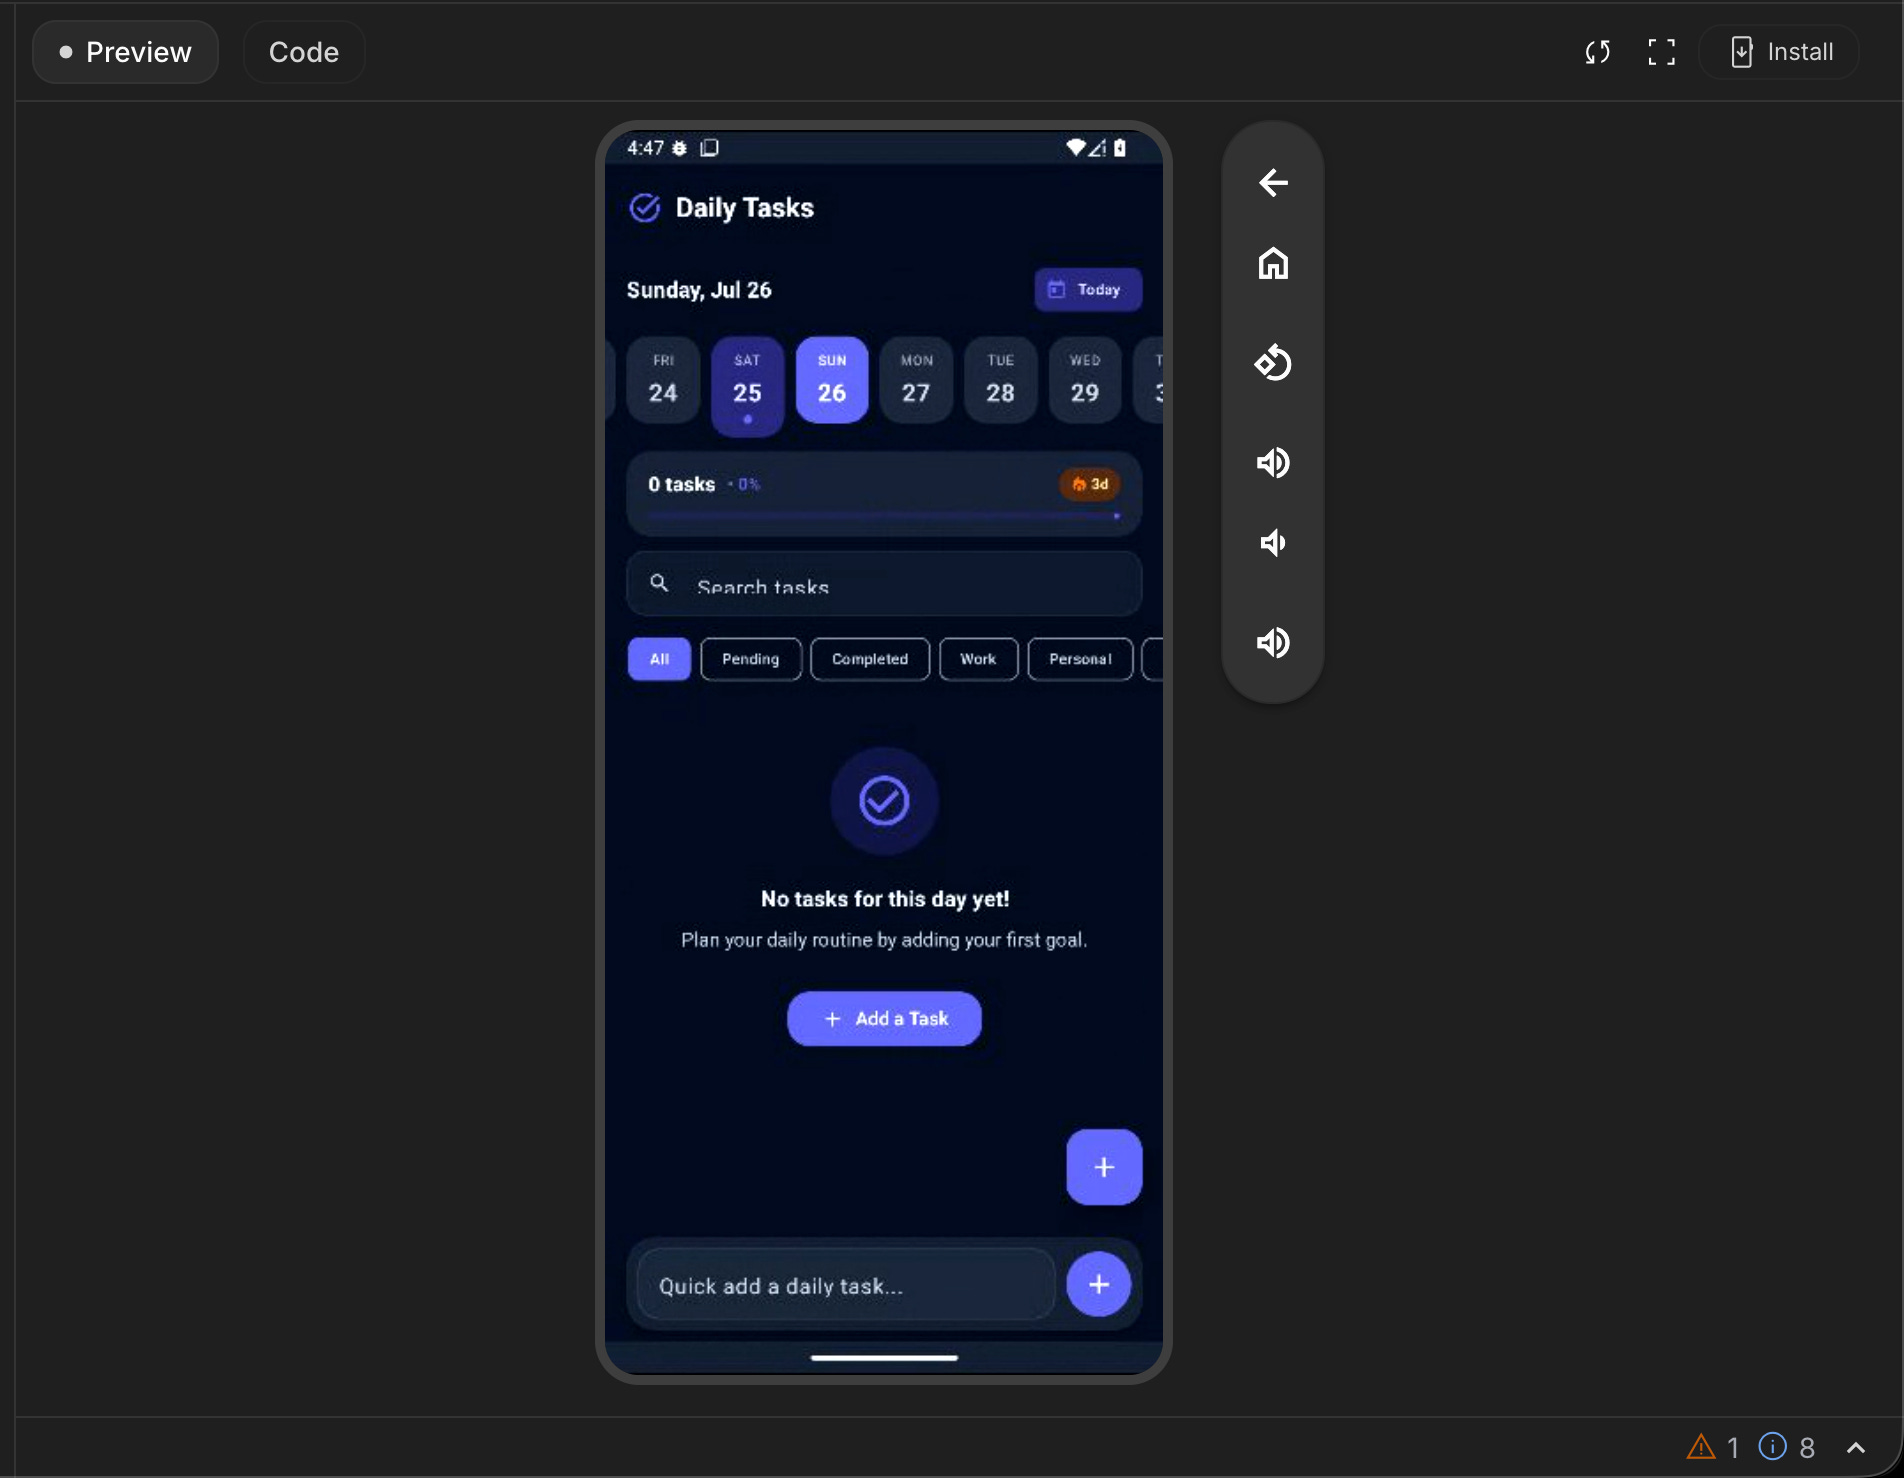
The good part: it behaves like a Pixel. You can tap, scroll, and interact with your app as though you were holding it. You can rotate it between portrait and landscape. And when the agent changes your code, the app rebuilds and the emulator refreshes itself.
Step 1: Tap around your app inside the emulator, using your mouse like a finger.
Step 2: Rotate it to landscape and see what breaks (something usually does, this is free QA).
Step 3: Ask the agent to fix whatever looked wrong, in plain words, in the chat panel.
Step 4: Watch it rebuild and refresh on its own.
Now the honest part. The emulator does not do everything a phone does. Camera and photo capture are not available in it. NFC and Bluetooth are not available. Location is simulated rather than real. And Google Play services, which includes Google Sign-In and Maps, work on a real device but not in the emulator.
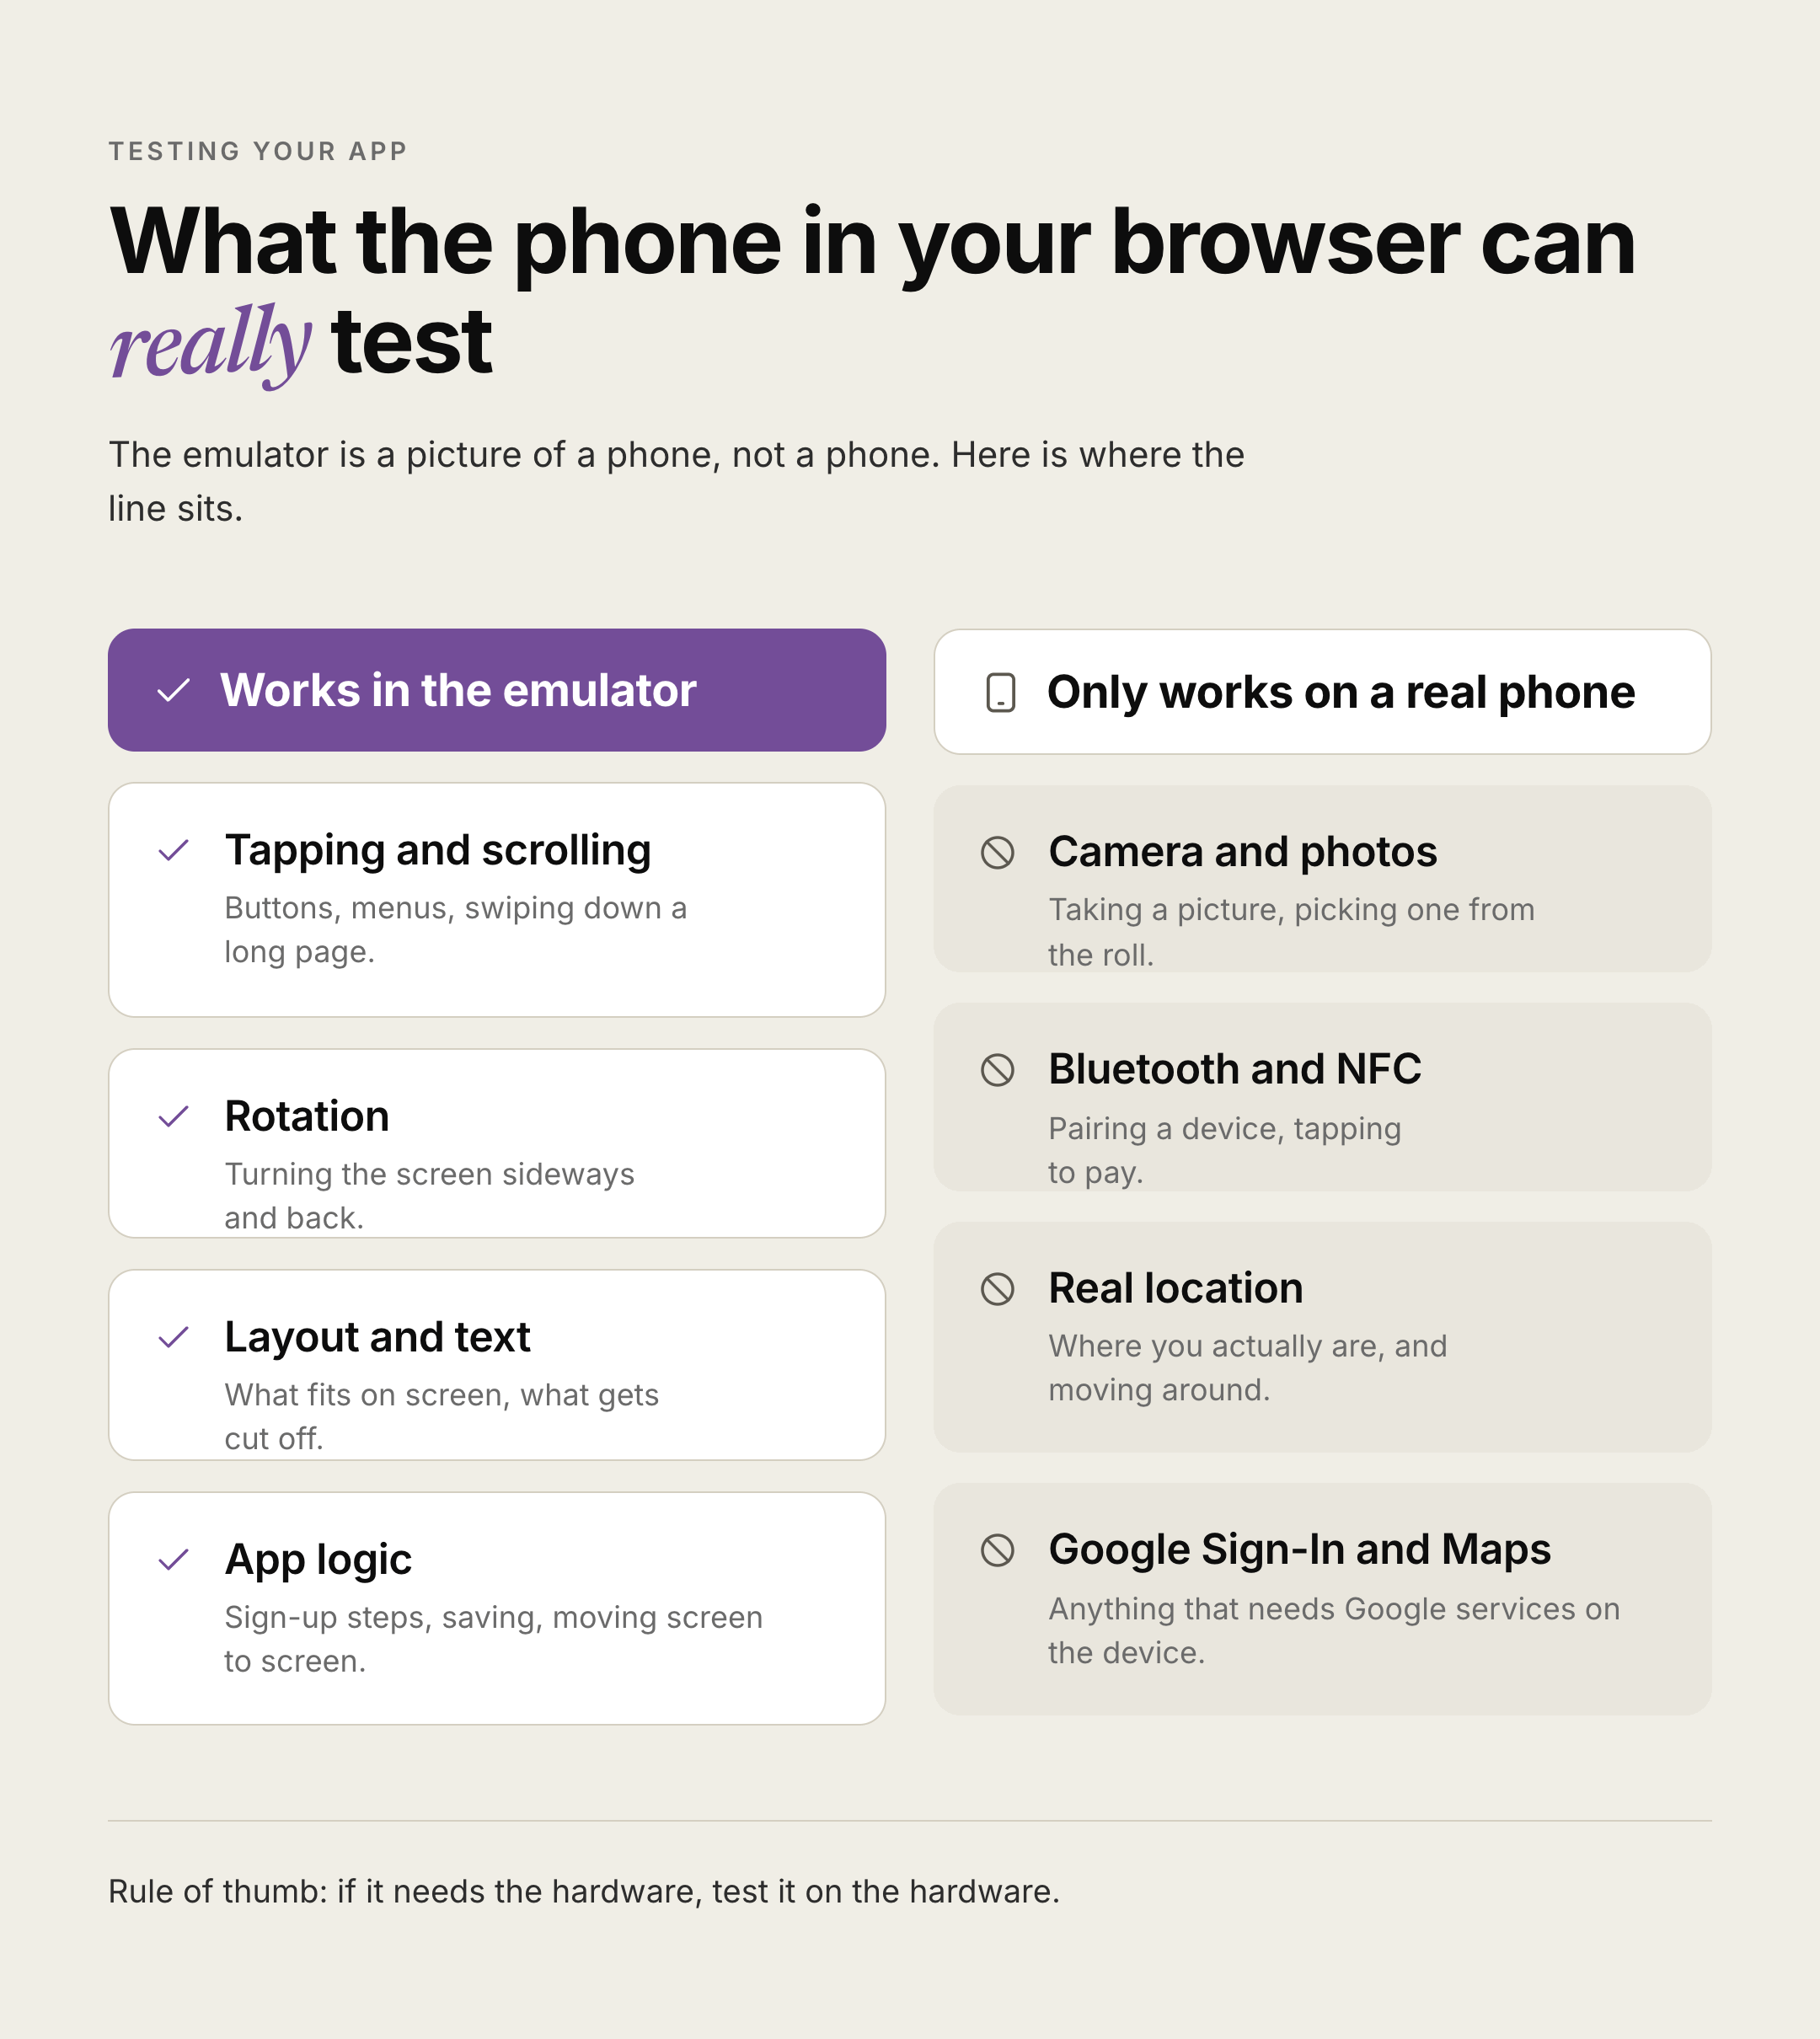
So if you build something that takes photos or signs people in, the emulator will make you think you are broken when you are not. Test those on the real phone in step 3.
3. Now put it on your real phone. This is the good bit.
Everything up to here happened in a browser. This step makes it real.
You need three things: Chrome or Edge on your computer, a USB cable, and Developer Options with USB Debugging turned on on your phone.
Step 1: On your phone, turn on Developer Options and USB Debugging. If you have never done this, search your phone’s settings for “Build number” and tap it several times until it tells you developer mode is on, then find USB Debugging in Developer Options and switch it on.
Step 1: the one phone setting that matters. Everything else stays default.
Step 2: Plug your phone into your computer with the cable.
Step 3: Back in AI Studio, find Install on Device in the preview panel and click it.
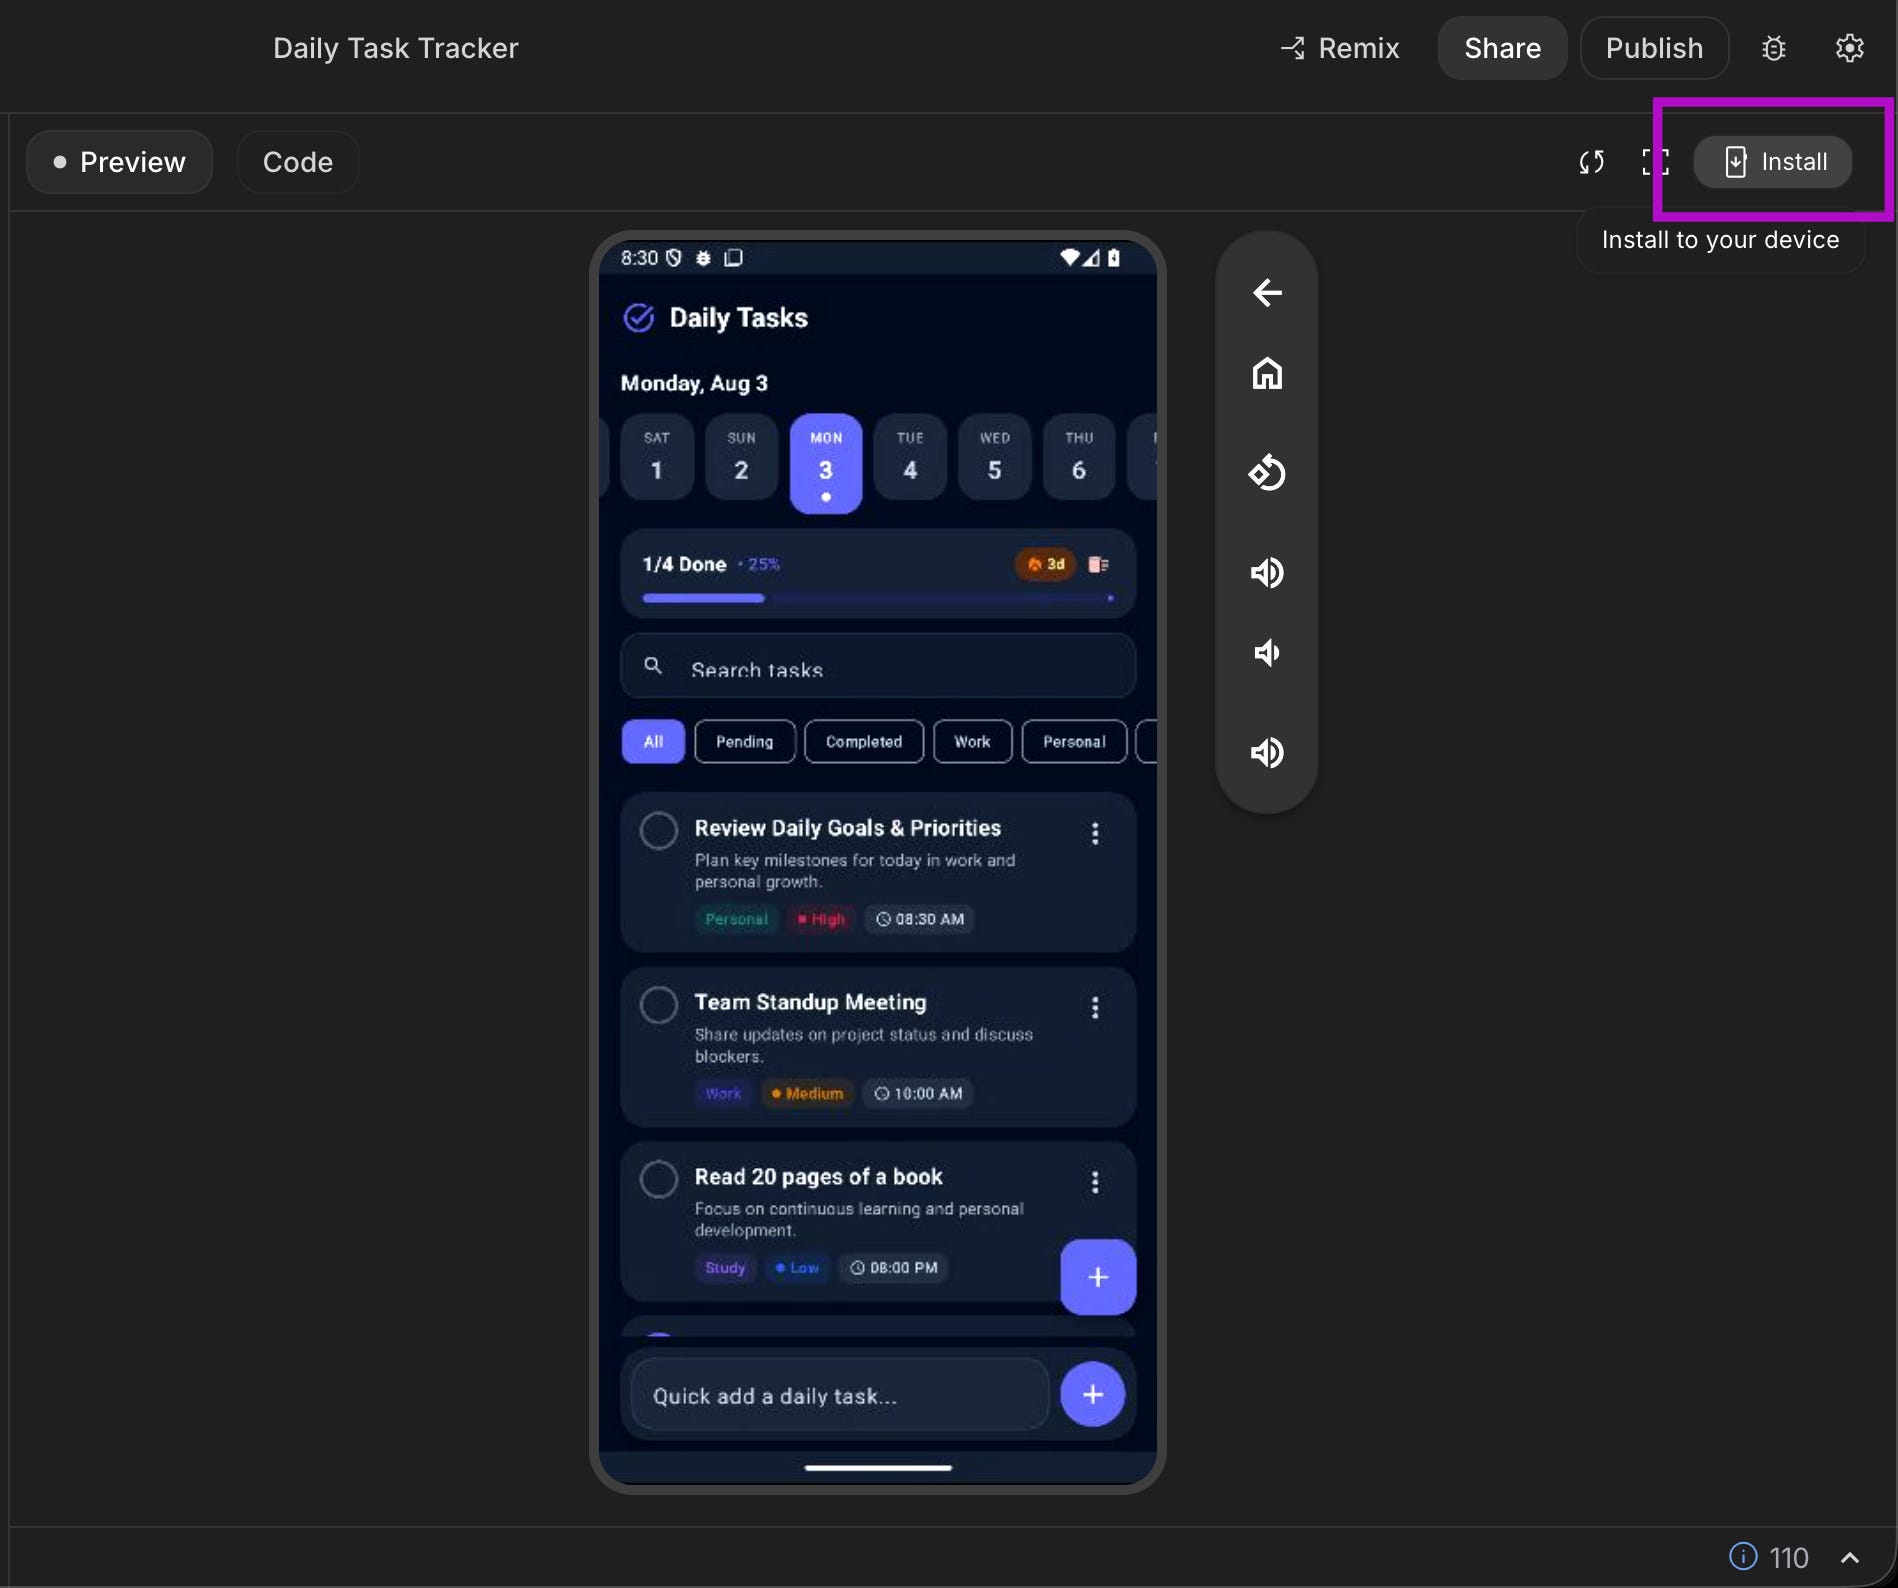
Step 4: Your browser will open a USB device picker. Choose your phone from the list.
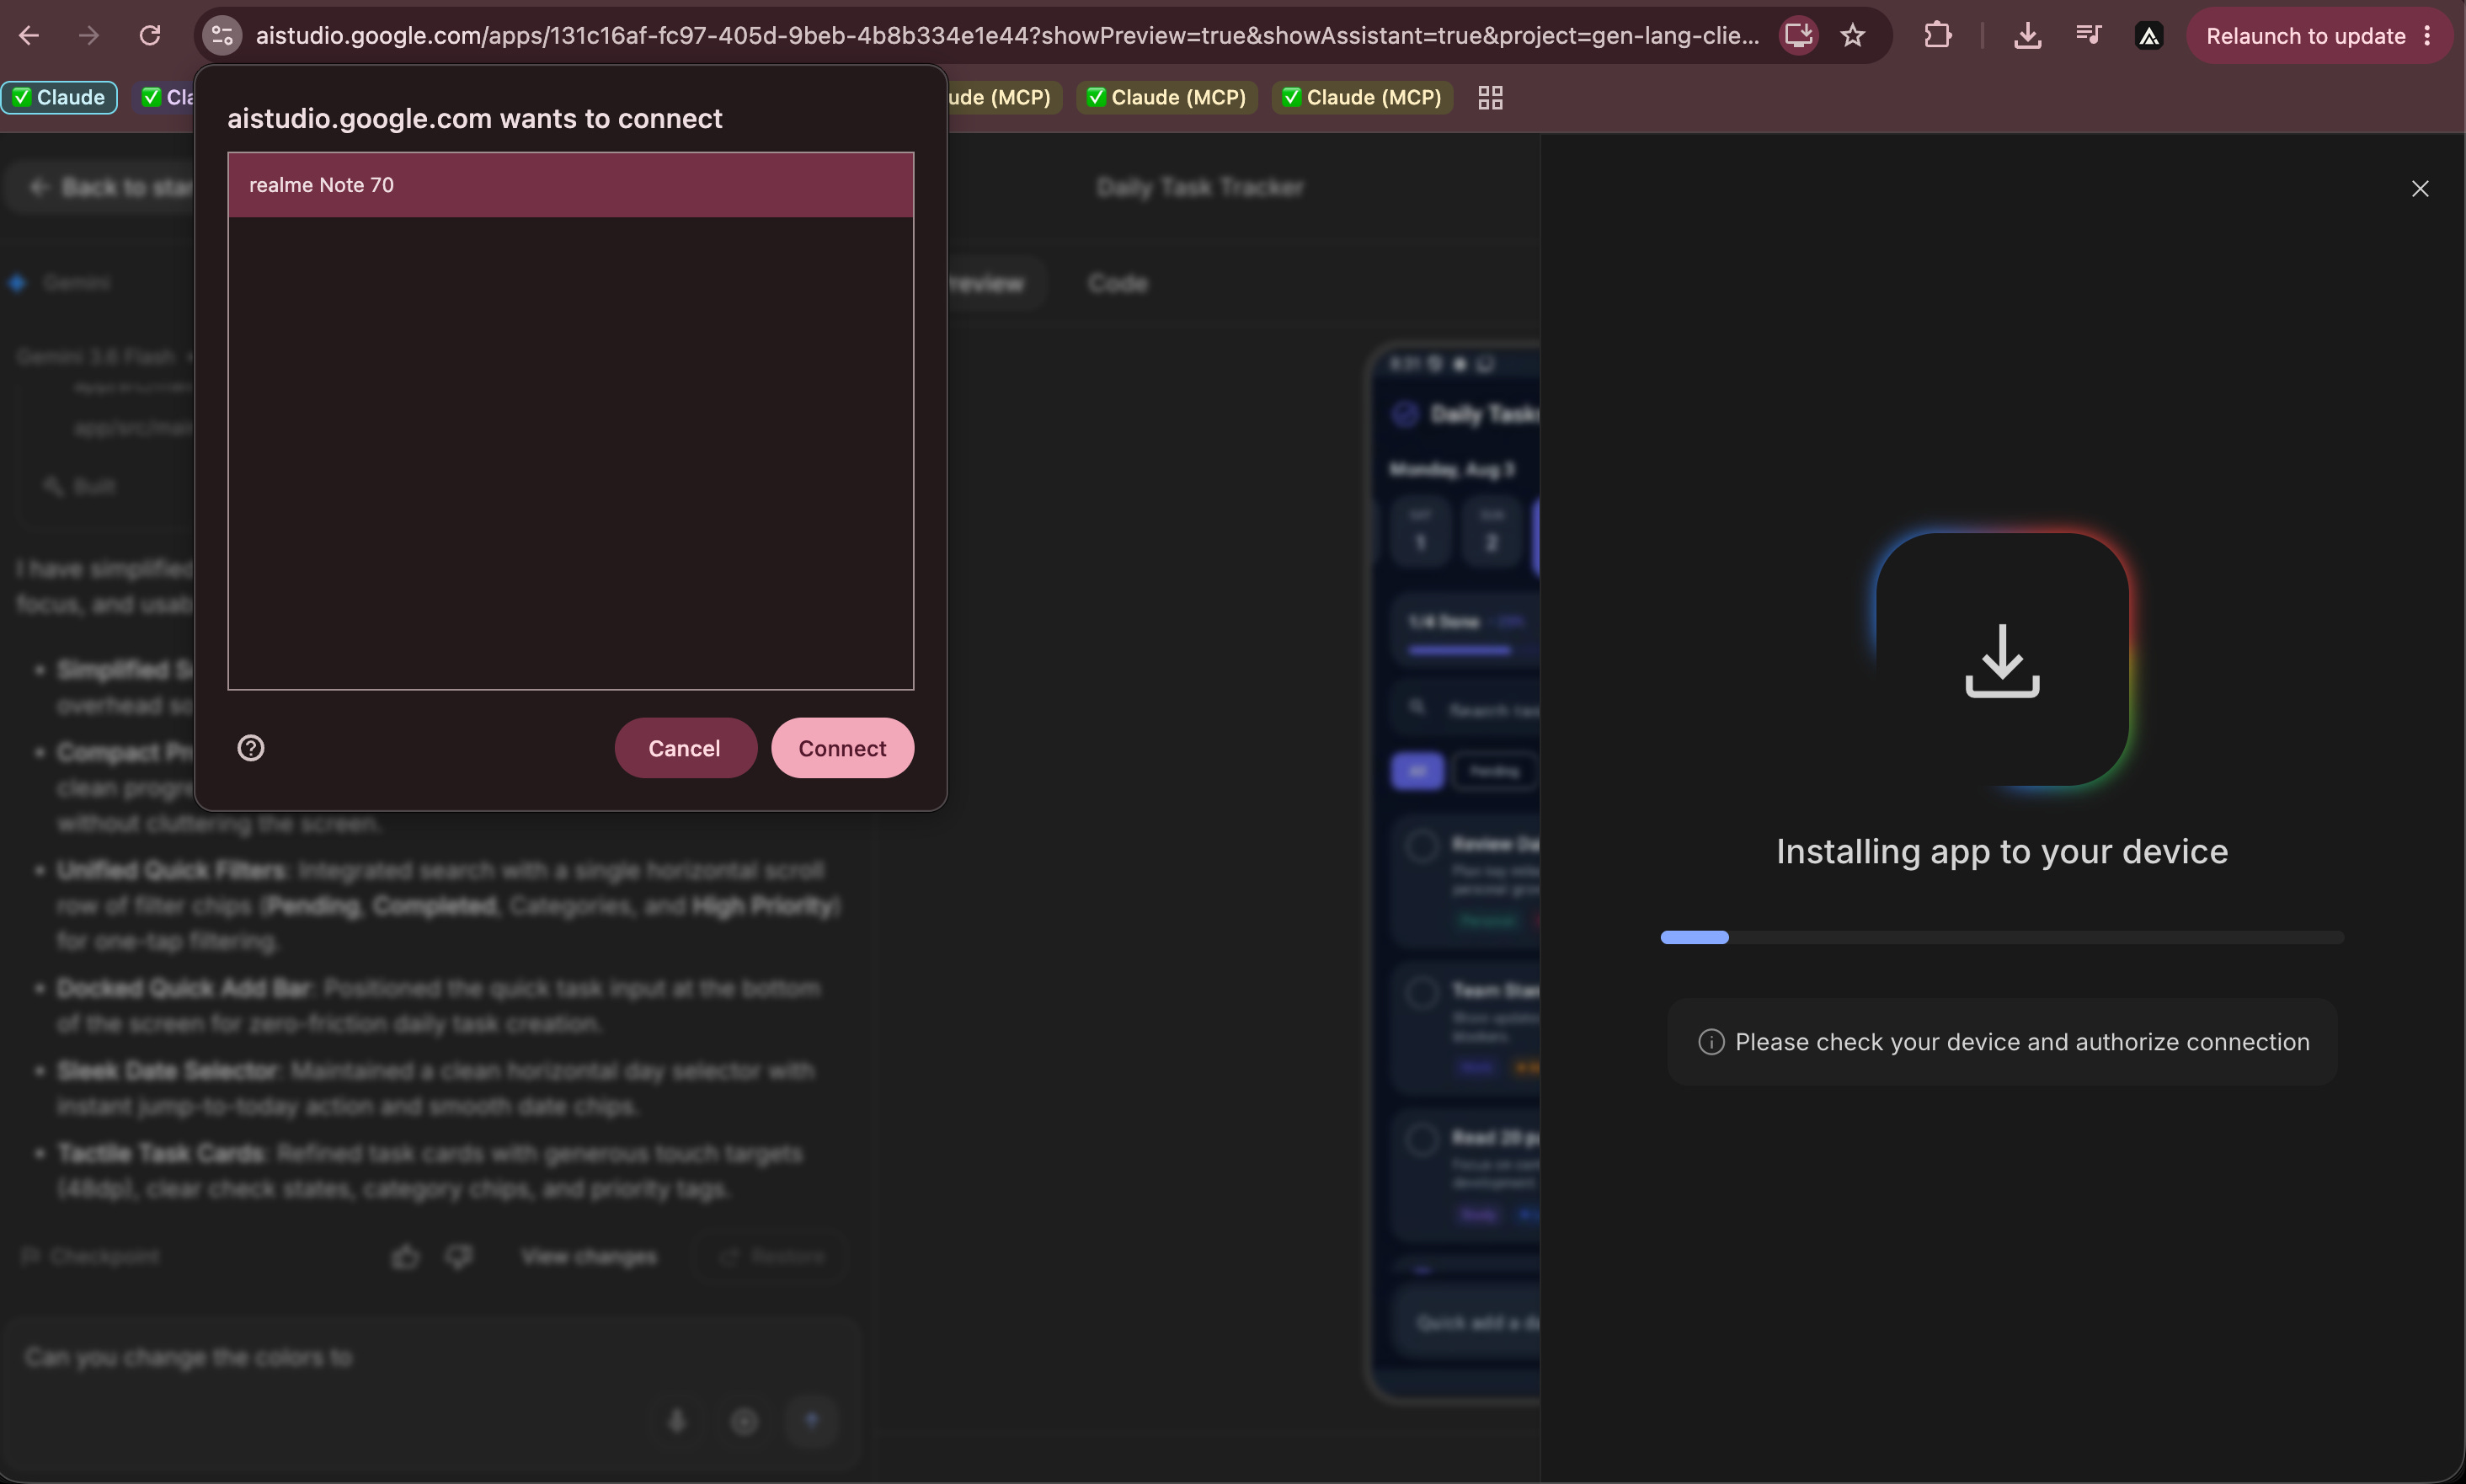
Step 5: If your phone shows an “Allow USB debugging” prompt, accept it. It appears the first time you connect.
Step 6: Wait while the app file transfers and installs.
Step 7: The app launches on your phone by itself.
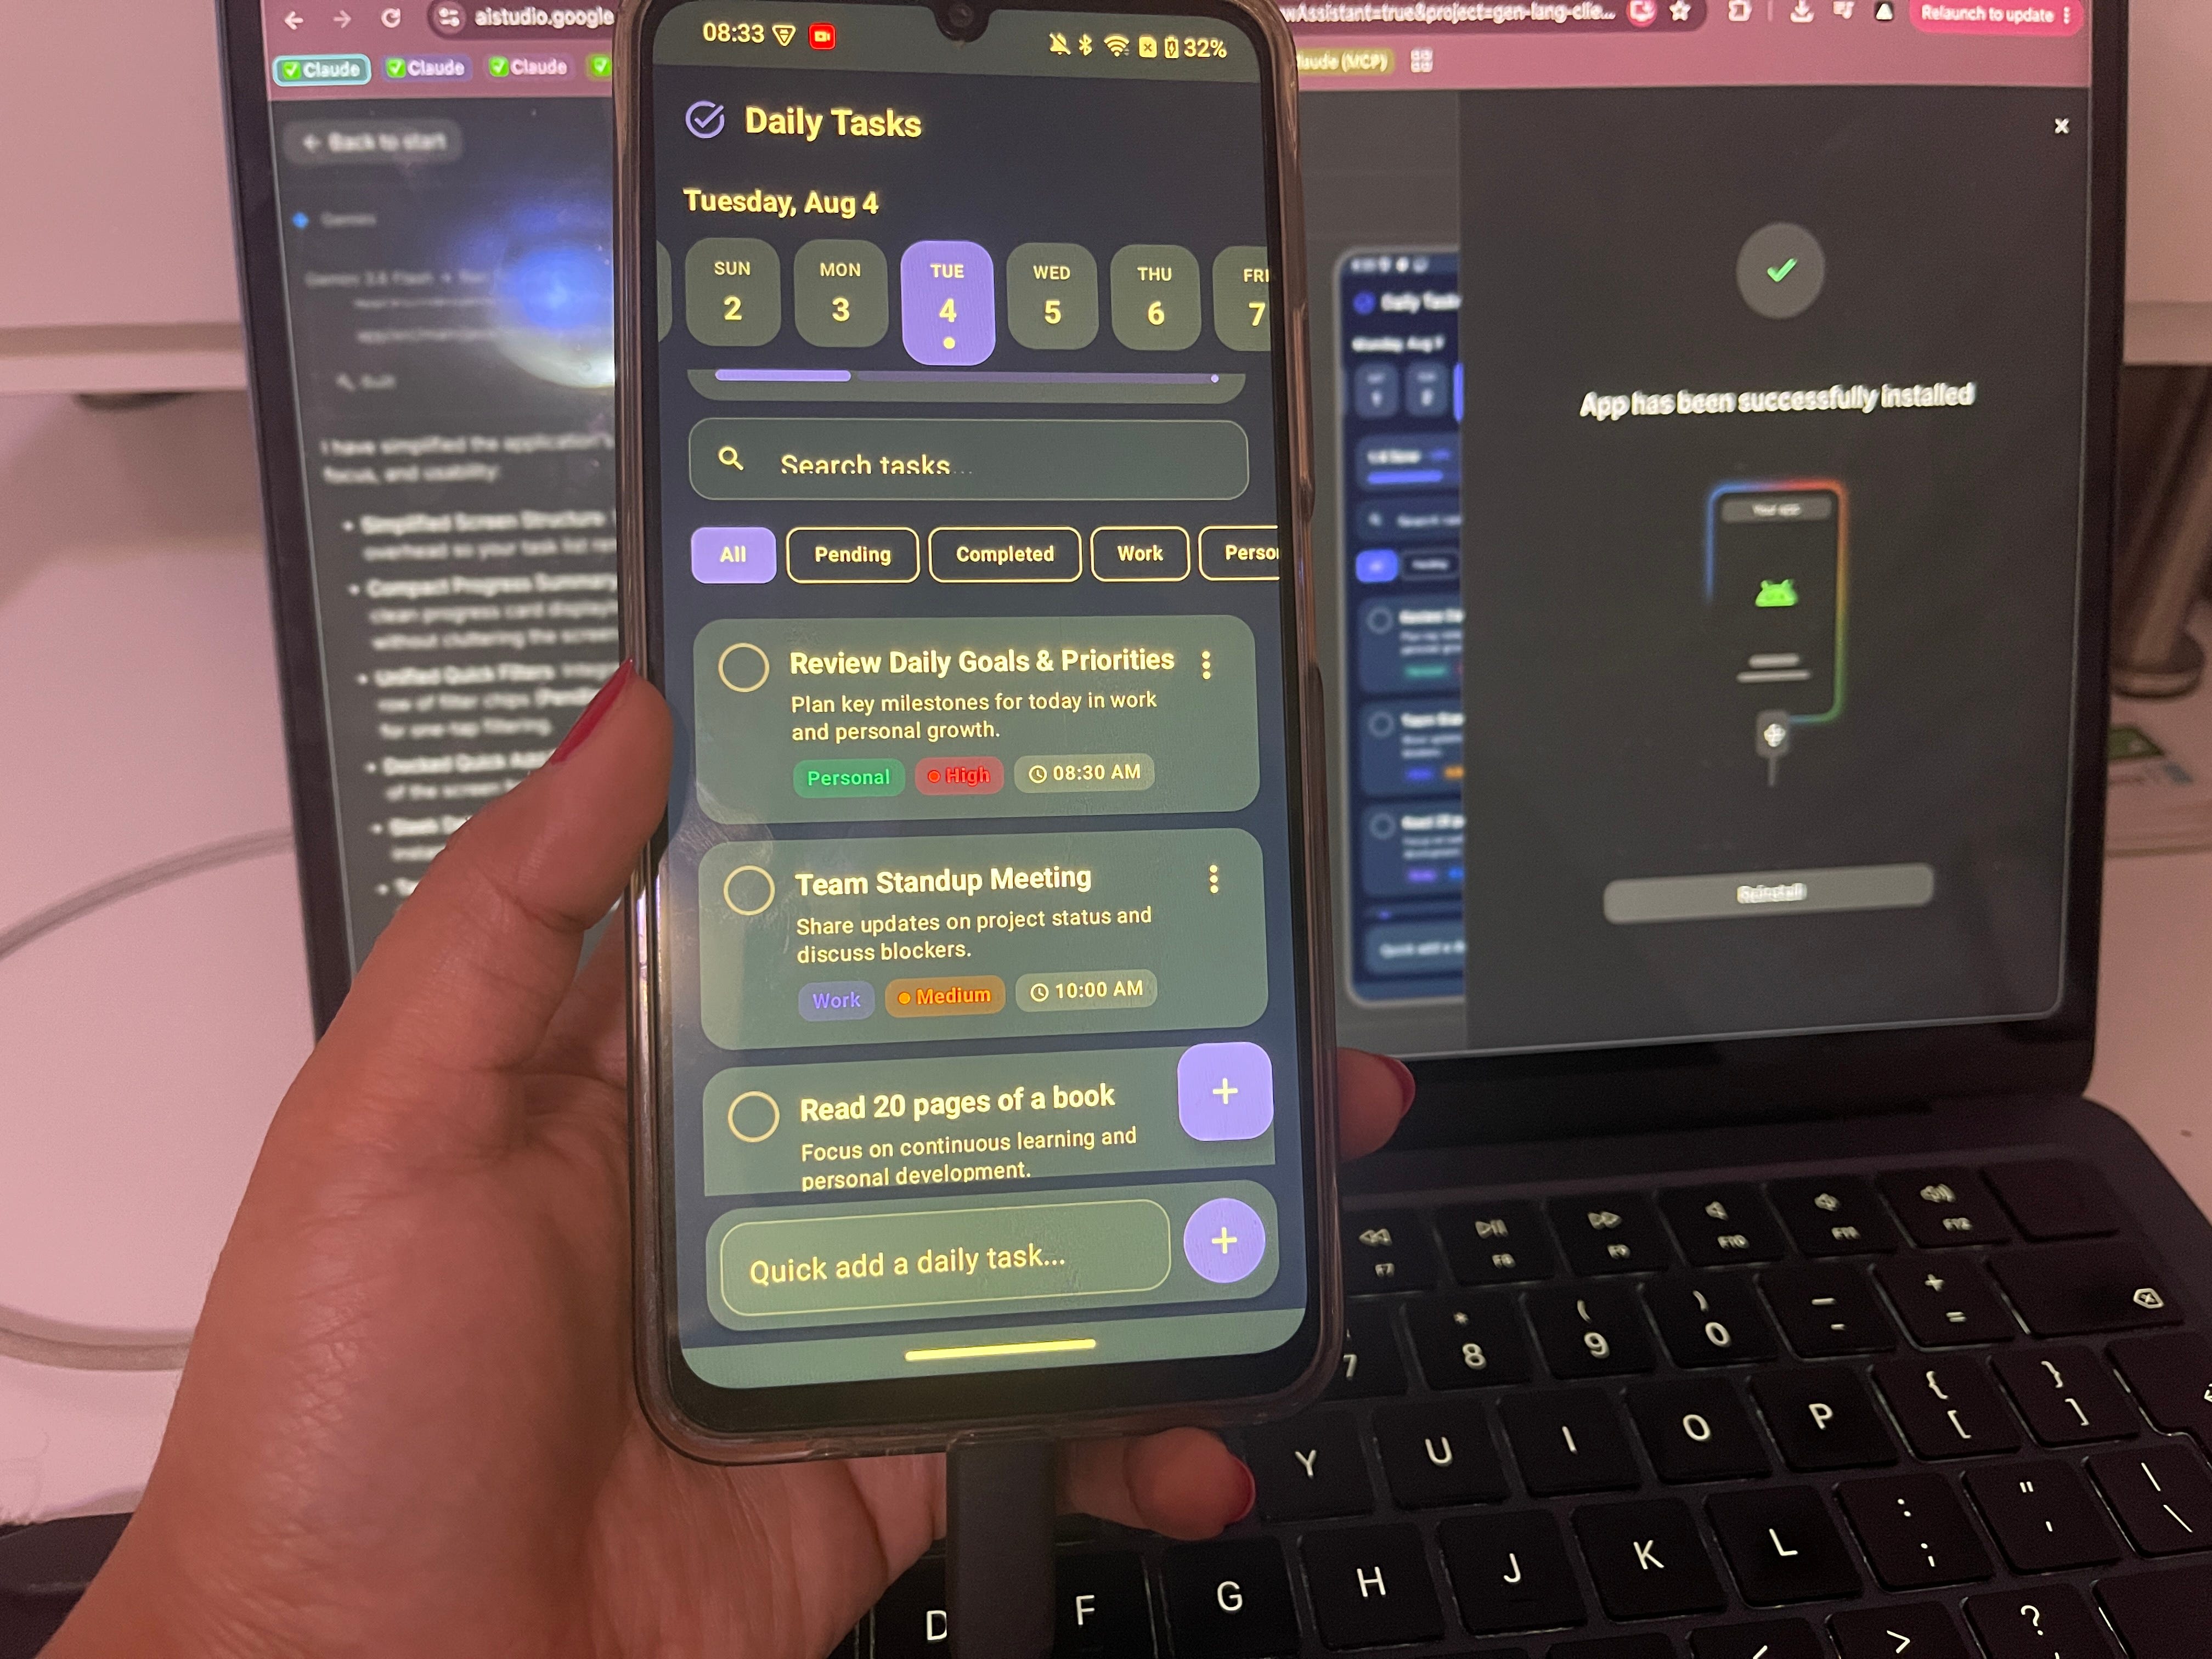
No local install of any developer tool was needed for that. The browser talked to your phone directly (this is done through a browser capability called WebUSB, and it is the reason you did not need to set anything up).
4. Let other people install it, without launching to the world.
You do not need a public launch. You need five people to actually use it and tell you the truth.
AI Studio can publish your app to the Google Play internal testing track, which lets you distribute to up to 100 testers.
Before you start, you need a Google Play Developer account. Google charges a one-time registration fee, listed as $25 at the time I am writing this, and you also need a completed developer profile in the Play Console.
⚠️ Confirm the current fee on Google’s signup page, these things change.
Step 1: In AI Studio, open Settings, then Publish.
Step 2: Click Publish to Play Store.
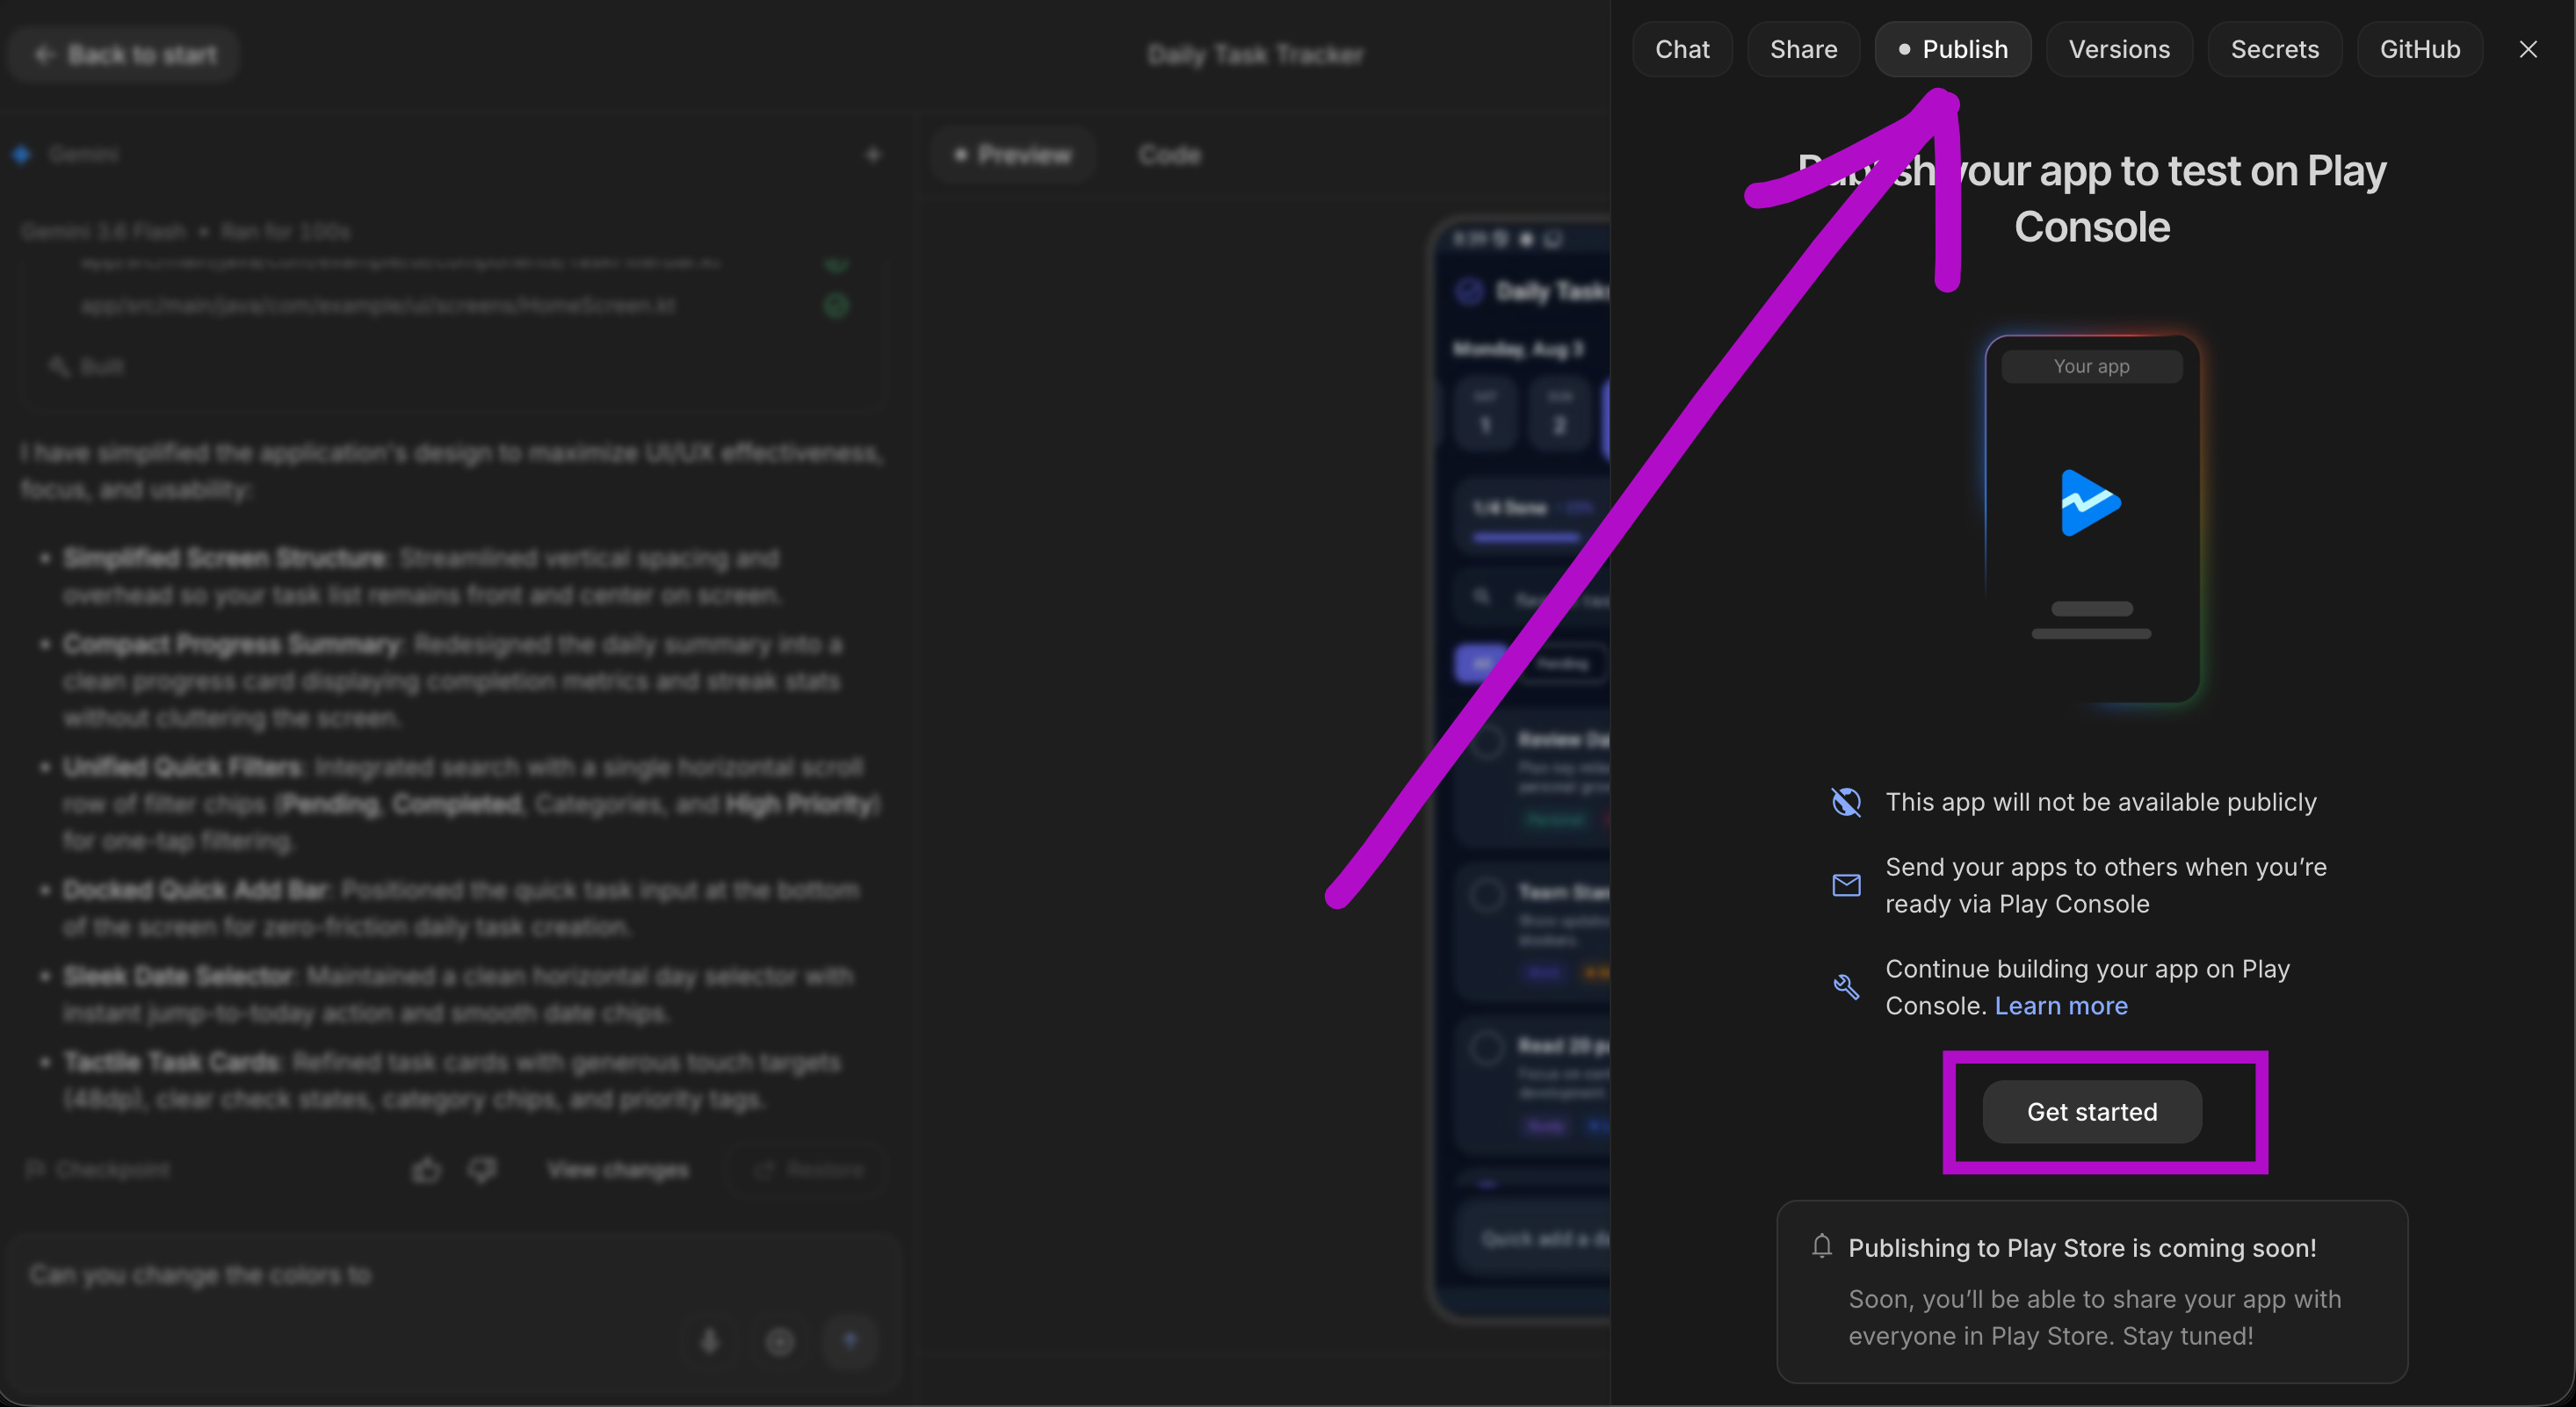
Step 3: Sign in with your Google Play Developer account when it asks.
Step 4: Let it work. AI Studio signs the app file for you using a managed key, creates the listing or uploads a new version, and publishes to the internal testing track.
Step 5: Copy the link it gives you.
Step 6: Send that link to your testers. They install like they would any app.
One important limit: this path publishes to internal testing only. A real public release still has to be managed directly in the Play Console. Which is honestly fine, because internal testing is where you belong until people actually like the thing.
If someone you know has been quoted an eye watering number for a simple mobile app, send them this.
5. What this path cannot do, learn it now not at midnight.
I am putting this before the pretty ending because it is the most valuable section in the article.
Android apps built this way are client side only. That means the whole Thursday article does not apply here. No Firebase database, no Firebase sign in, no secrets storage, no Google Workspace connections, and no multiplayer. Those live on the web side of AI Studio.
So an Android app built here can save things on the phone itself, and it cannot yet share data between two people’s phones through this path.
The other limits, plainly:
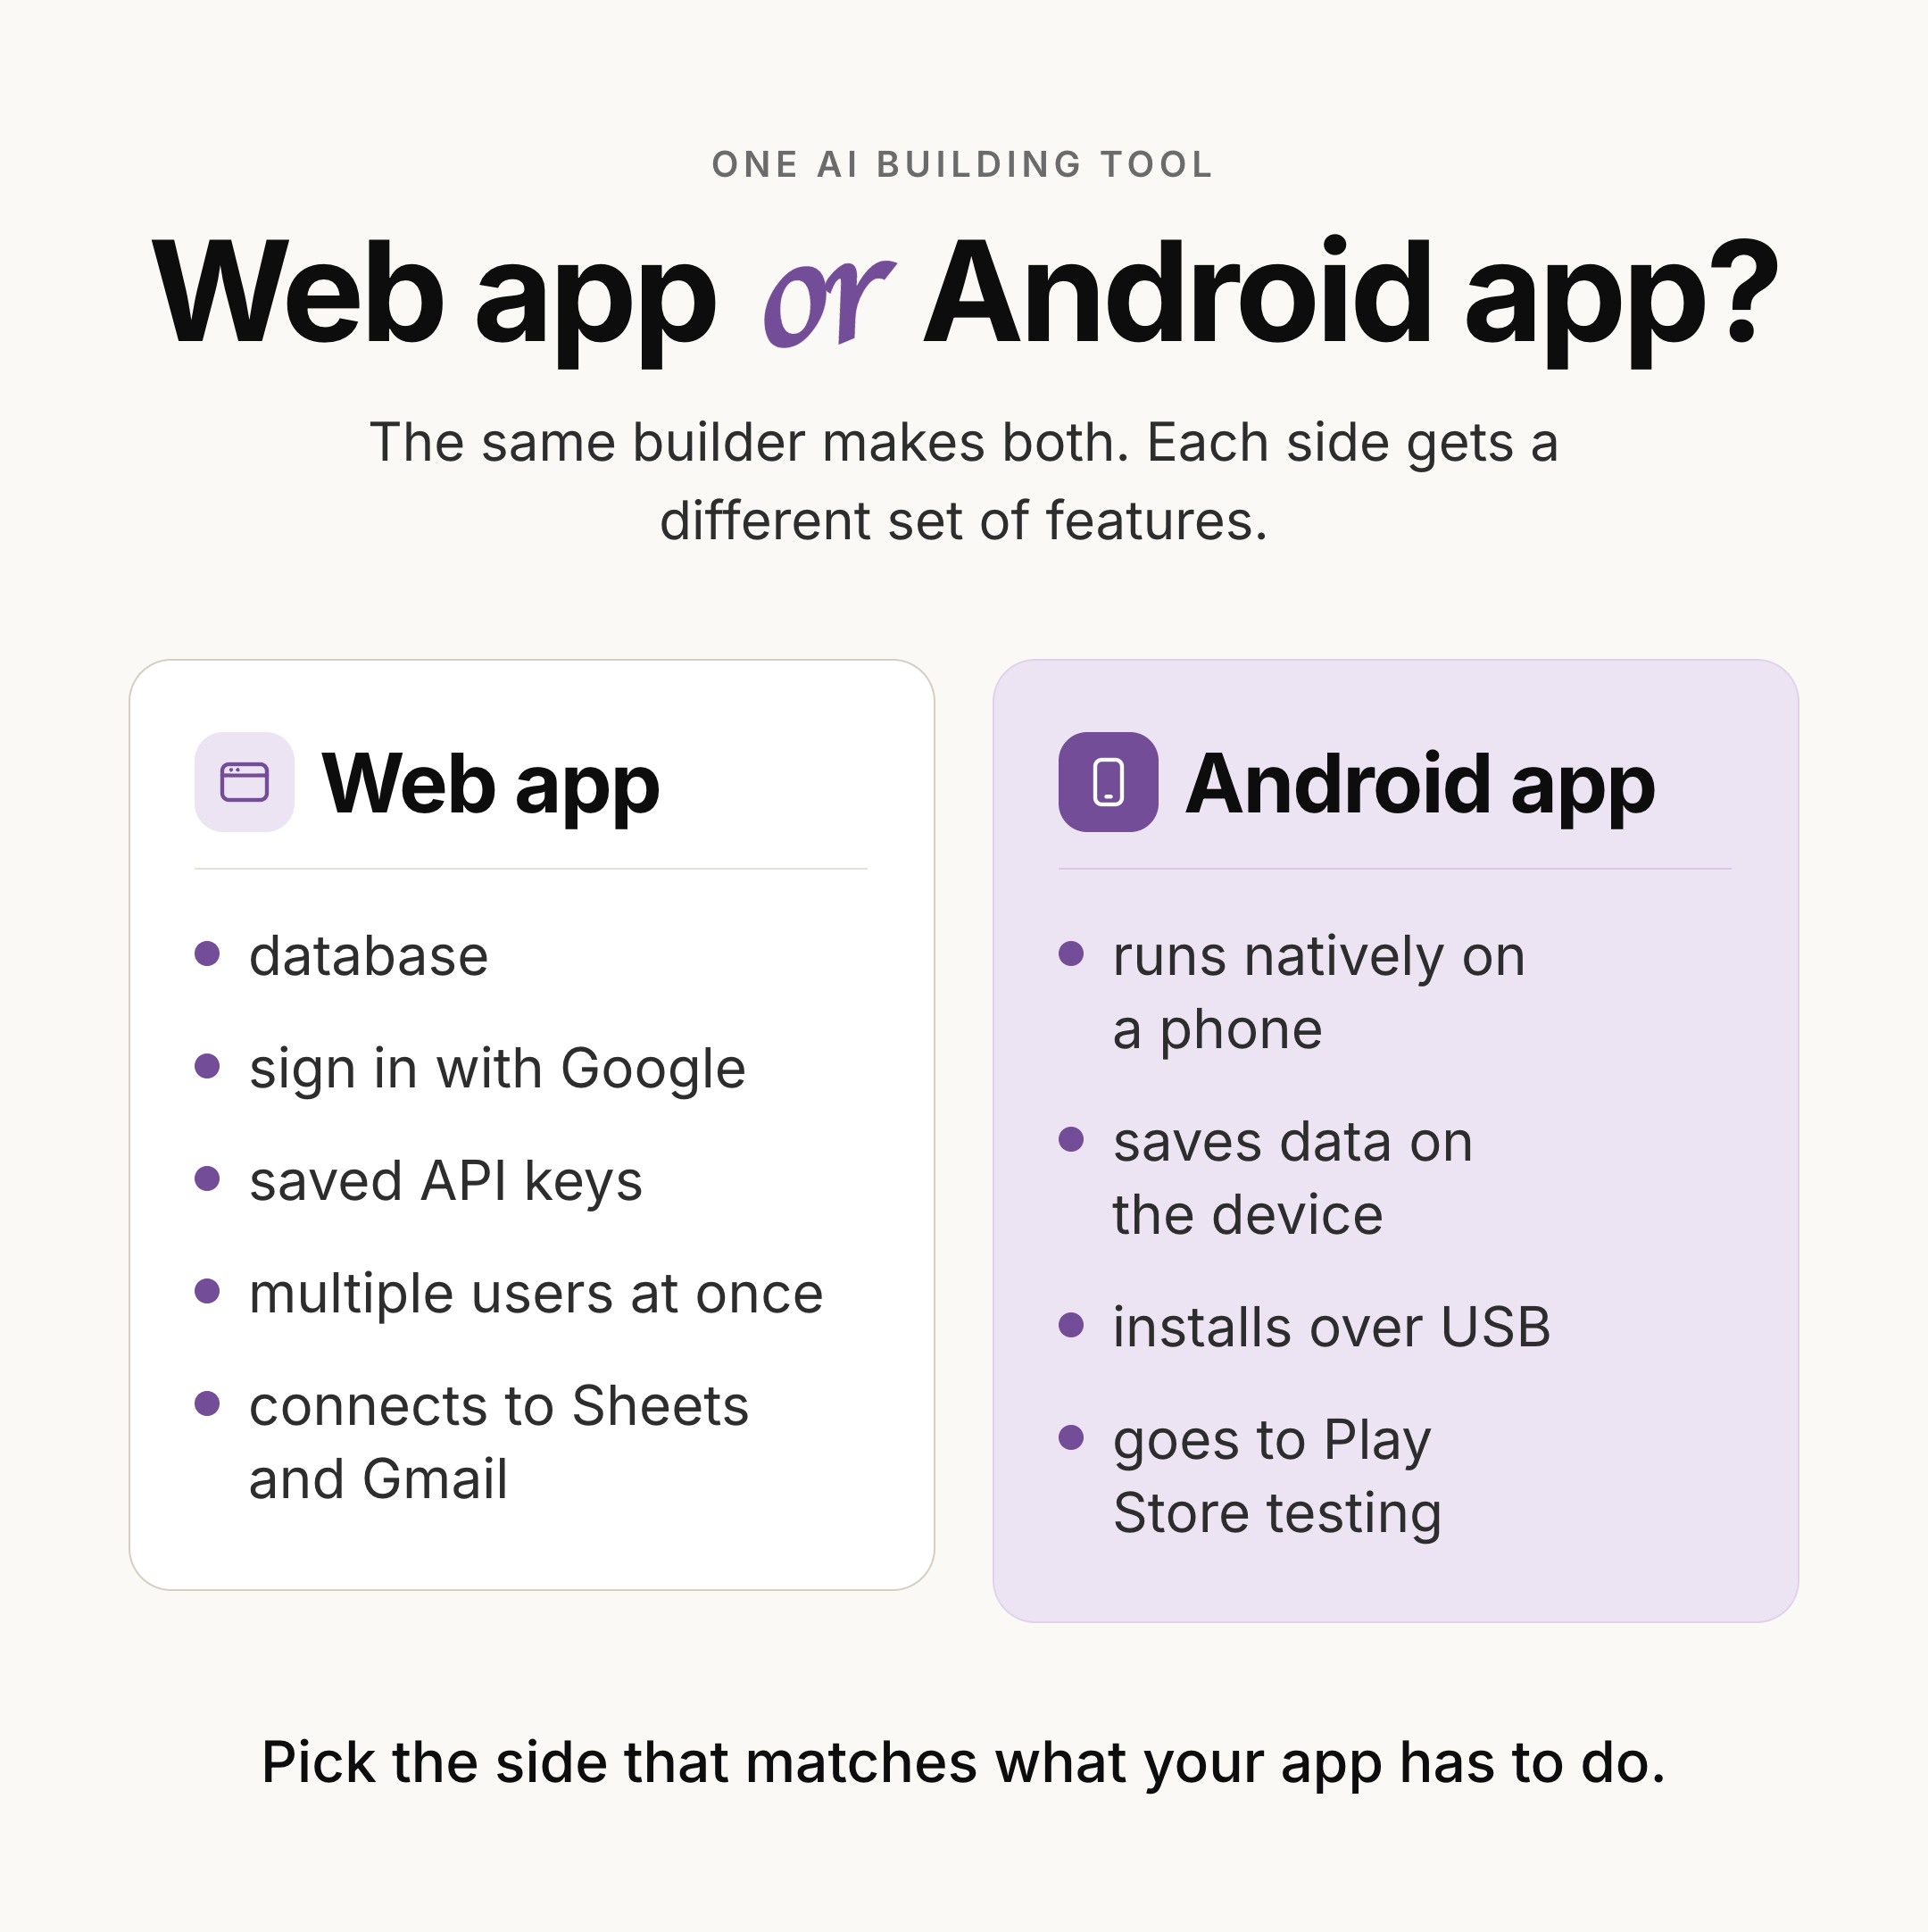
One screen architecture only. Single activity, single module projects.
Kotlin and Jetpack Compose only. No Java, no old style XML layouts.
No native C or C++ code. If you do not know what that means, you do not need it.
Phones and tablets only. No watches, no TV.
Export is a ZIP file only. You can download the whole project and continue in Android Studio, but pushing an Android project straight to GitHub is not available on this path yet.
That last one matters more than it sounds. It means when your app outgrows this, the exit is a download, then a real editor.
6. So what would I actually build on this path?
Given those limits, here is where this shines, from real client conversations.
A tool for one person’s own use. A tracker, a calculator, a checklist, a converter, something that keeps its data on the phone and never needs anyone else’s.
An internal tool for a small team, where everyone installs from the tester link and each person’s copy stands alone.
A demo you hand to someone in a meeting. Not a slide of an app. An app.
And a proof of appetite. Ten testers using something for two weeks tells you more than any survey, and now it costs you an afternoon to find out.
This is also the version of the story where the harder parts are already handled: the database that syncs between people, the sign in, the scaling, the bit where two hundred users show up at once.
If you would rather hand that part off than learn it, book a free consultation call with me and we will work out what it would actually take.
Where this falls short (being honest).
The emulator will mislead you. Camera, Bluetooth, real location and Google sign in behave differently there than on a real phone. Test on the phone before you trust anything.
Client side only is a real ceiling. The moment your app needs to share data between people, this path stops and the web path starts.
Internal testing is not a launch. One hundred testers is a great start and it is not the Play Store. Production still goes through the Play Console properly.
A developer account costs money. Small, one time, and still a real barrier for someone testing an idea on a weekend.
Speed is not judgement. You can now build a mobile app in an afternoon, which means you can now build the wrong mobile app in an afternoon, faster than ever.
The cable was the surprise, not the code.
Nobody paid me to write this, and I have no relationship with Google beyond being a very frequent user of their free tier. (I pay sometimes too).
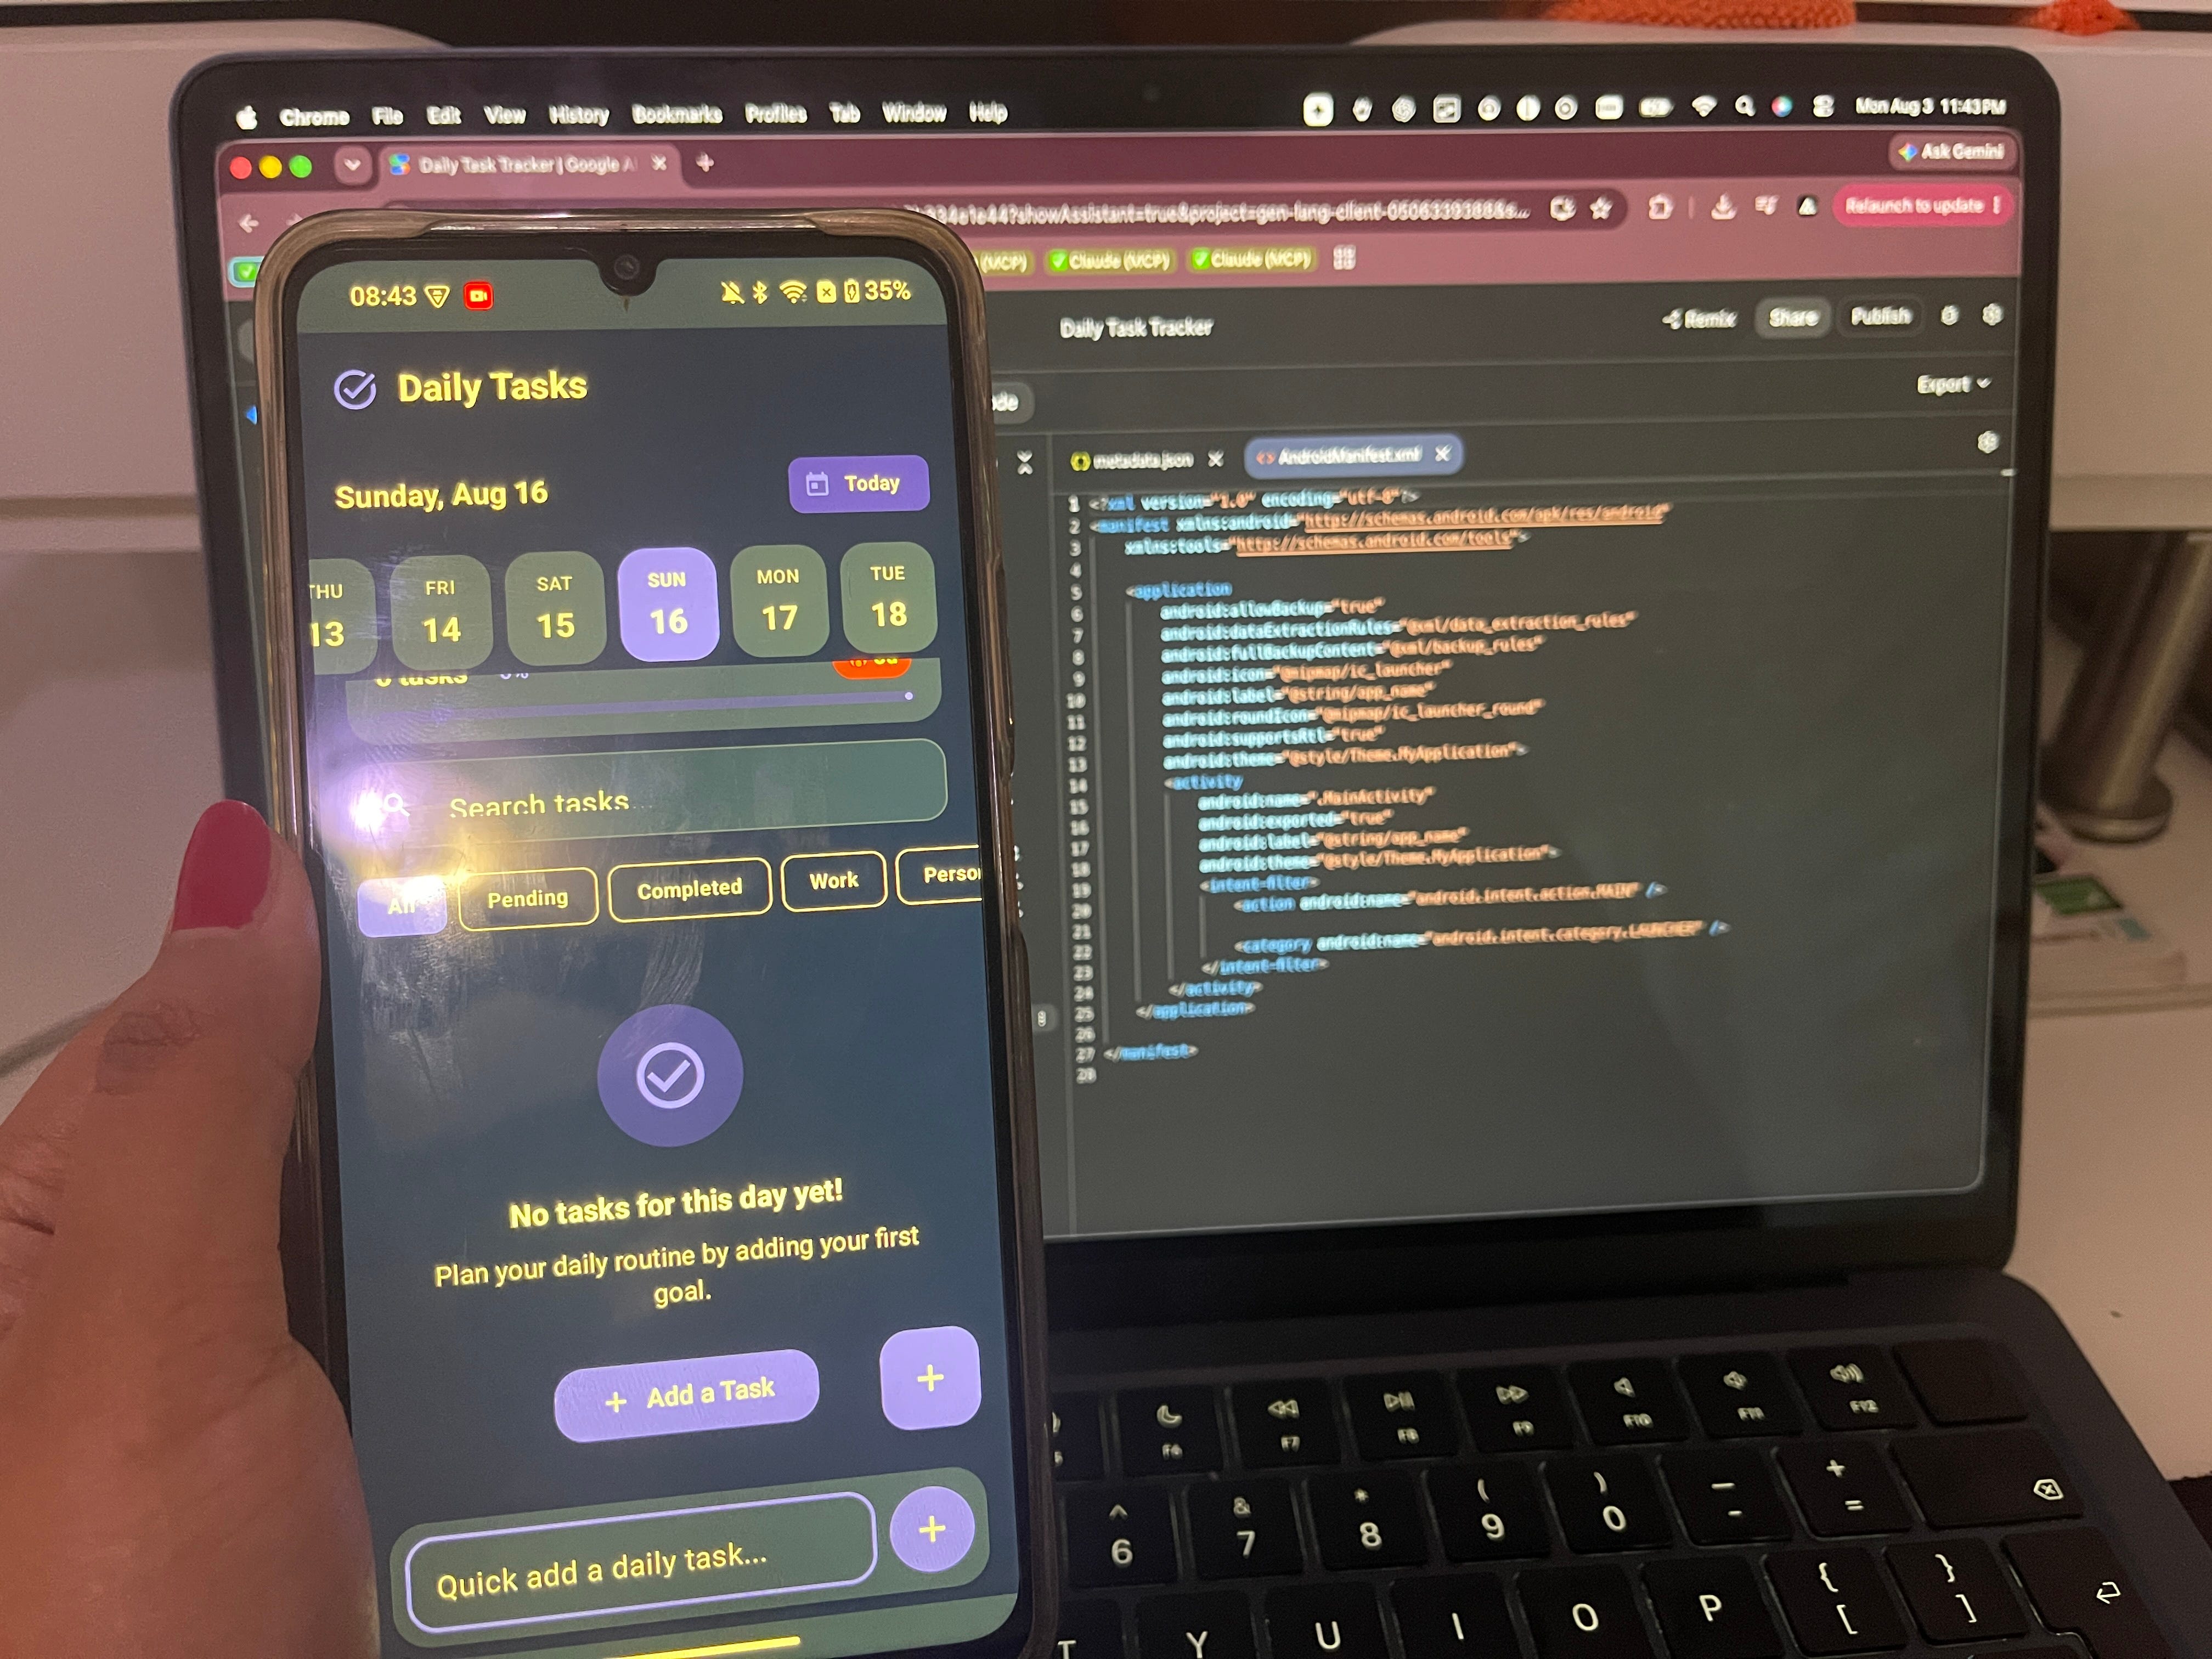
The thing that actually changed my mind was not the generated Kotlin. It was plugging in a cable and watching an app I described in one sentence open on the phone in my hand, with nothing installed on my laptop.
This newsletter grows one forward at a time. If this one earned it, send it to the person who told you a mobile app was out of reach this year.
And if someone forwarded this to you, subscribe here so the next build arrives on its own.
Save this.
Build mode, platform picker, choose Android. That is the entry point.
One plain sentence gets you real Kotlin and a browser emulator.
The emulator cannot do camera, Bluetooth, real location, or Google sign in.
Developer Options plus USB Debugging plus a cable plus Install on Device equals your app on your phone.
Settings then Publish then Publish to Play Store gets you internal testing, up to 100 testers.
Android on this path is client side only. No database, no sign in, no multiplayer.
Outgrowing it means downloading the ZIP and moving to Android Studio.
PS: If you follow this today, take the photo of your own app on your own home screen. You will want it later, and it is a much better founder photo than a laptop and a coffee.
A note on this one: it’s a paid-tier post. I’m leaving it open to everyone today because I want people actually building, not reading about it. This is the kind of thing that normally sits behind the paywall.